Wednesday, December 30, 2015

Square Shrine Shadowbox by Dianna's Crafts

Hi Everyone, Dianna here with my last Holiday Season post for 2015.  I used a new 2016 product from Gypsy Soul Laser Cuts -  a Square Shrine Shadowbox and use Graphic 45's - A Christmas Carol to create a winter wonderland in a box. 


First I dry assembled Gypsy Soul Laser Cuts- Square Shrine Shadowbox (coming soon in 2016), then I painted it with white gesso.  I wanted a semi-covered look so a streaking effect is what you want.  I used white and diamond Stickles all over the outside of the box.  Then I fussy cut Graphic 45's -  A Christmas Carol (8x8 pad).    I cut up two sheets of the title page so that I would be able to create a pop up affect.  


I used old sheet music for the back ground and tore up on of the snowing pages from Graphic 45.  I then used drop off from Gypsy Soul Laser Cuts chipboard to layer the church and houses.  I then used a snow pen for the roofs.  After the snow dried, I used Stickles on the snow.  You cannot see it but the sleigh is actually only half of a sleigh on the paper but I hid that with the carolers being the highest pop up.  I used a highlighting pen on all of the paper.  I fussy cut the flowers, tag and postcard from Graphic 45's - A Christmas Carol 8x8 pad.  A bit of scrap string finished the tag.  

Thank you for looking.

Items Used
Postage Stamp Box (coming soon)
if you want it sooner email at:
gypsysoullasercuts@gmail.com

Other Items
Graphic 45
Saturday, December 26, 2015

Baby Boy Album by Dianna's Crafts

Hi Everyone, I have a baby boy mini album using an old Cheese-It box and Gypsy Soul Laser Cuts.


I started with Gypsy Soul Laser Cuts Baby Boy Clothesline Set.  I used paint markers in blue in green then after the paint dried I used Stickles to make it pop.  I then requested a special order from Gypsy Soul Laser Cuts for the Baby Max.  I covered the Cheese It box with green paper, then I added the ribbon to close it.  After the ribbon, I then covered the green paper.  


I created the spine by cutting 4 x 6 inch strip then score it at one inch at both ends, a 3 x 6 inch strip then score that at one inch on both ends, finally a 2 x 6 inch strip, score at 1/2 inch on both ends.  Then I stacked all of the strips on top of each other and glued them.  I then cut the bottom and top of all of then ends at a angle so that the pages will glue in.  I punched out the scalloped circles and added the years to the top of the inserts which are 3 x 5.  


I then cut six pages at 8 x 6 and scored at the 4 inch part to create the fold to glue to the spine. I created the pocket by folding a 8 x 4 inch paper and gluing the pocket to the page.  I painted Gypsy Soul Laser Cuts Precious Little One from the Words and Phrases 2 blue and used white Stickles.  


I created a water fall by using the scrap paper.  I then used the booties from the Baby Boy Clothesline Set and the Sweet Max from my special order and painted them blue.  After they dried I used white Stickles. 


The last thing that I did was create a tassel charm using blue and green beads.  The overalls and bib are the end pieces from the Clothesline.

Thank you for looking!


Items Used
Gypsy Soul Laser Cuts

Saturday, December 19, 2015

Tea with Mrs Claus by Dianna's Crafts

Hi Everyone, Dianna here with two of my favorite things Christmas and Tea.  I think that Mrs. Claus does not get enough credit and needs a tea break with her friend. 


I started with Gypsy Soul Laser Cuts Miniature China Cabinet. I first dry assembled it then painted it Holly Green. I then cut two scrap strips of paper to line the shelves.   I then used tybek (from mailing envelopes) to attach the doors.  The flourishes are a special order from Gypsy Soul Laser Cuts, just email gypsysoullasercuts.com and ask for the flourishes on the miniature china cabinet.  The clock, teapot, cupcakes and tea cups are from a mold using air dry paper clay Delight from Creative Paper Clay.  The Delight air dry paper clay is super easy to use and sets up in a couple of hours. I used Copic markers on the molds.


The miniature table and chairs are coming soon to Gypsy Soul Laser Cuts. I painted the table and chairs with white acrylic paint. I painted the top of the chairs and seat red. I then daubed Stickles all over the chairs prior to assembly.  I used a candy cane stripe scrap of paper for the top of the table.  The teapot and cookies are from the same mold and Delight air dry paper clay. 

I requested that Gina at Gypsy Soul Laser Cuts enlarge two of her Fashionistas so that I could use them as Mrs. Claus and her friend.  I painted the ladies with white acrylic and used Copic Markers on Mrs. Claus.  Mrs. Claus fur ruff is actually from a snow bottle and to make it sparkly I used Stickles.  Stickles was also used on her boots and hat.  Mrs. Claus's friend got scraps from the shelf liner and some green paper.  Copic Markers was used on her hat, face, hair and boots.  Nail art stones were used for her buttons and Stickles was used on her hat, gloves and boots. 


Thank you for looking!  


Items Used
Gypsy Soul Laser Cuts
Miniature Table and Chairs 

Other Items
Creative Paper Clay

Saturday, December 5, 2015

Twelve Days of Christmas by Dianna's Crafts

Hi Everyone, Dianna here with my first Holiday Project of the Season! Gypsy Soul's 3 Story House and Graphic 45's Twelve Day's of Christmas.  I decided to create all twelve days within the house. 


The house comes in 8 pieces. I suggest doing a dry run and pre-assembly prior to gluing or painting. I used white gesso, then papered and glued.  After papering, I then used gesso again to create an aged appearance. 


I decided to used the top floor to house the live stock.  I fussy cut the out all the Graphic 45's Twelve Day's shapes. I used greenery and a nest to glue the shapes in place. 


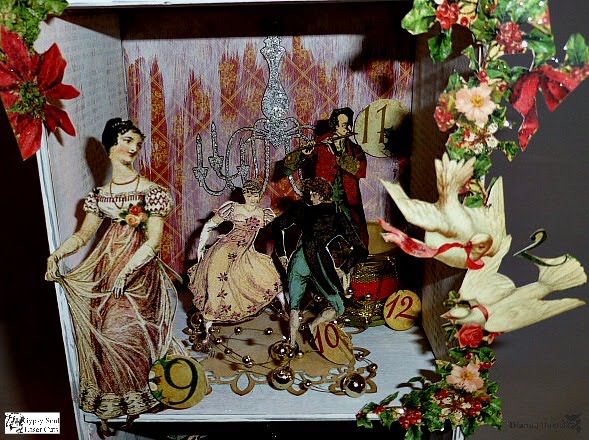
I used gesso on the paper to age the paper.  I placed Gypsy Soul Chandelier on the back wall after I painted it white and used gold stickles.  The piper is standing on a drum from an old Christmas sprig.  Small scrap chipboard pieces were used to help the lords leap and ladies dance.  I used gold beads to add light to the inside of the house. 


I hinged the twelve days and the swan with scrap chipboard so that they would stand up on their own. The Gypsy Soul frame was fussy cut out of the collage frame birds and ivy,  painted gold and gold stickles was used to create bling. I placed greenery and glued the milking maid. I fussy cut the calling birds and turtle doves. 


I fussy cut out the large twelve days of Christmas to place on the back of the house.  I fussy cut Collage Frame Birds & Ivy frame out and glued one of the calling birds to create a picture. 


I used a  1 inch punch and punch a lot of circles using kraft paper and Graphic 45's "My turtle dove". I scored the circle at 1/4 and then scored at two angles. I then glued the 1/4 angle to the roof.  After, I glued all of those circles and used gesso to created snow.  


Thank you for looking!

Items Used

Other Items

Saturday, November 21, 2015

Christmas Elements by Dianna's Crafts

Hi Everyone, Dianna here with my take on Gina's Designs Facebook Craft Group November Challenge by Deann Moffo McNulty.  The Challenge is to be inspired by a Pinterest Project and I found a Christmas element set that inspired me.  


I used elements from Gina's Stackable Element Set, pink and green owl Christmas paper and punches to create the above elements set.  The top circle is a 2 -1/4 inch punch and the two flags are from the Stackables set.  I simply traced the shape of Gina's Stackables onto the paper and fussy cut.  Gina's Stackables give the elements additional dimension. I used Christmas stamps that I had laying around from last year. All edges were distressed with vintage photo ink.

The tag was created by using a punch and fussy cutting the owl and presents. Gina's Mini Flourishes Bella was colored green with a Copic Marker.  I added Stickles, apple green and blue bling to all of the elements for some more pop. 

Below photo show all of the shapes that are included in Gina's Stackable Element Set. I only used 11 shapes from this set to create my elements, so there are a lot more elements to make.  


You have to join the group, if you are not a member link here:

Just a reminder that Gina's Designs will have a name change effective December 1, 2015 to 
Gypsy Soul Laser Cuts. 


Below is link item for my inspiration. 

Items Used
Gina's Designs
Stackable Element Set - Coming Soon


Friday, November 13, 2015

Marker Cabinet by Dianna's Crafts Blog

Hi Everyone, Dianna here with Gina's Designs Marker Cabinet and my second video.  I suggest doing a dry assembly prior to gluing and painting.  The first two pictures show all of my copic markers, some paint markers, sharpies and bella glitter pens. The whole cabinet is sturdy and holds up to 165 markers, it will also hold spectrum noir markers.


I used Beacon's 3-n-1 glue to assemble and then of course I do things backward spray painted prior to gluing, this made it more difficult to assemble for gluing. Beacon's Fast Drying Decoupage was used to adhere the tissue paper.  The tissue paper is from Marshall's.  


Here is the back of the cabinet, which shows more the over all affect of the tissue paper.  I think it looks like stamped leather.  


Please check out video too!  Thanks for looking!


ITEMS USED
GINA'S DESIGNS

Other Items
Beacons 3-n-1
Beacons Fast Drying Decoupage
Tissue Paper from Marshall's

Saturday, November 7, 2015

Magic Memory Keeping Organizer by Dianna

Hi Everyone, Dianna here with Gina's Designs Memory Keeping Organizer turned Magic Card Holder.  I started out making this for myself and then after I finished my son said "Mom that is cool!  Love the way it looks and it will fit my Magic Cards!"  "Thanks Mom".  The same son then took it upstairs and filled it with his cards.  I had to steal it back for photos and got the look only teenagers will give you.  I gave it right back.  


I suggest doing a dry run assembly prior to gluing.  This way you know which piece goes where prior to the commitment of glue.  I used Beacon 3-n-1 to assemble the organizer because I had thought to use this as an example selling at crops with Gina but of course plans change.  If you are not planning to travel with your storage piece then Scotch Quick Dry works just fine.  After assembly, I spray painted the organizer bronze.    


I found way awesome tissue paper at Marshall's and have been saving it to paper my storage pieces.  I first traced each side of the box on the tissue paper then cut out the sections.  I used Beacon's Fast Drying Decoupage first on each section of the box and then on the back of the paper.  The great thing about tissue paper is that if you tear it, it becomes "distressed" and no one can tell that you did not tear it on purpose, which of course that was the look that I was going for.  

Please come back and check out the video's of other storage pieces!

Thank you for looking!


Items Used
Gina's Designs

Other Items
Beacon's 3-n-1
Beacon's Fast Drying Decoupage
Tissue paper from Marshalls

Saturday, October 31, 2015

Halloween With Gina's Designs and Creative Paperclay

It's time for a fun Halloween Theme Blog Hop! Gina's Designs Lasercuts Design Team has teamed up with the Creative Paperclay Design Team for this fun blog hop. We are all excited to show off our Halloween projects and even more excited about the fact YOU can win a prize.

The Prize Package includes: 1 pound package of Paperclay 1 sample package of Sandits and $25 shopping spree to Gina's Designs Lasercuts 

How to enter - each of these will get you one entry 
1) Stop by each blog on the hop and leave a comment
 2) Pin each project on your Pinterest site
 3) Share this post on your Facebook page


Hi Everyone, Dianna here with a Halloween Fence Wall Art.  I painted the fence black and then cut the paper out to match the fence.  I tore up the paper to create a spooky effect.  Then I distressed the paper with black ink.  Then I painted the Haunted House black and used Stickles all over the house.  I used a purple Copic on Vellum behind the windows.  The skeleton was painted white and used white Stickles on the skeleton to make him pop.  The tree and fence was sprayed with a gray, then a silver mister, I then distressed the tree and fence with black ink. The shutters were painted with green paint and green Stickles was applied.  


Creative Paperclay Delight was used in molds for the bats, pumpkin, owl and moon.  I have to admit that I had a lot of fun using the Paperclay Delight.  It was so easy to use in the molds.  After the clay dried, I used my Copic Markers, which took to the clay very easily.   


I used Spanish moss around the house to but not the tree because I wanted the 31 on the paper to show. 

Thank you for looking and do not forget to stop by all the blogs by using this link:

Friday, October 30, 2015

Spooky Sentiment and Tombstones by Dianna's Crafts

Hi Everyone, Dianna here with Gina's Designs Spooky Stand Up Sentiment and Tombstone Stand Ups.  I made this project with Amy Loves' celebration of 500 Youtube Subs in mind.  I will be sending this to Amy as part of her giveaway.  Make sure you hop over and see
Amy's Youtube channel.


First I spray painted the sign black and cut the Spooky out of three different papers. I then embossed the purple with a splatter folder.  I then tore the different papers in various areas to give a more tattered look.  I then distressed the edges with black ink


I then painted the wrought iron set black and placed the large fence behind the Spooky.


I painted the skeletons white and used white and purple Stickles on all the skeletons.  I cut the arms and legs off the large skeleton, punched holes in all the pieces and used brads to reattach the limbs.  I used orange paint on the pumpkin and placed the pumpkin in the skeleton. I placed a green rosette with a black bat on the top of one of the fence spikes. The spiderweb was painted white and daubed with white Stickles.


I decided to paint four tombstones black and used black Stickles on three of them.  The fourth black tombstone I used grey Stickles over the black to create a streaked look.  I painted the last tombstones grey and distressed both with black ink.  Stickles was used on the angel tombstone and the center stone was papered with left over scrap paper.  


ITEMS USED
Gina's Designs


Saturday, October 24, 2015

Witch Door Owl by Dianna's Crafts

Hi Everyone, Dianna here with a Halloween Witch Owl.  Gina made me a witch hat to fit the door owl.  

I started by spray painting the owl, hat, eyes and wings black. I then used a Fisker double feather punch and punched about two hundred feathers in black, green and two different colors of purple. 


I could not help myself and made Wanda eyes with eye lashes.  (Yes, I named the owl Wanda).  I traced the eyes, fussy cut them and then cut them in half for the eye lid.  I then punched a 2-1/2 circle in purple,  I then punched a 1-1/2 inch circle in white and a 1 inch circle in black. I then cut straight lines in a two inch strip of black paper for the eye lashes.  Around the black circles I used Stickles to give the eyes some more pop.  The nose was traced and fussy cut out.  


I used black Stickles first and daubed all over the hat.  I then used a dark purple Stickles and daubed that all over also.  I then used a light purple Stickles and created high lights.  I created a rosette with the same paper as the one on wings.  The feathers were colored with purple and green markers.  I used Stickles on the feathers.  The spiderweb was colored with a white paint marker and white Stickles. The purple and green spiders were left over from previous project. 


I sprayed Gina's "Wicked" with green Maya Mist and it dried just like the picture.  I placed another spider on the title and glued it to the wings.  Done!


ITEMS USED
Gina's Designs


Friday, October 16, 2015

Tea Composition Box by Dianna's Crafts

Hi Everyone,  this is my first Shabby Chic project and also my mother's day gift to my mom.   We both love tea, so I made her a something to that matched her new bedroom colors and her love of tea. 


I painted Gina's Designs Composition Box white and then used a light beige to create a white washed look (which you cannot see but is there :).  I used Graphic 45 Botanical Tea paper and fussy cut the birds, teapot and rose out.  I tore the teal paper and distressed it for the background.  The I used a teal spritz on Gina's Designs Cardstock Doily.  


The bottom box has a lace back and a art deco brooch with a black ribbon bow.  I stamped a victorian lady stamp and left it black and white except for the hat and dress which I colored with Copic Markers.  


The second box's back was papered with Graphic 45 Botanical Tea and the humming birds.  The butterfly is from Gina's Designs and I used Twinkling H20's.   The key was painted white then silver to create a marbled effect.  The yellow rose is from Graphic 45 and the embossed cut outs were distressed with ink.  I used a row of seed pearls on the edge of the embossed cut out. 


The third box has 1/2 of a Gina's Designs Cardstock Doily lightly distressed.  The teal button is one of two used in the box.  The tea cup and spoon is from Gina's and were painted white then chalk ink was applied.  The flower stamp is from Graphic 45.  The flowers were white and spritzed with teal paint, allowed to dry then spritzed again with a silver mist.  The little frame is actually a ball label holder that I got on clearance.  The frame was a bright gold so I lightly painted white then went over it with a silver sharpie.  I put black velvet ribbon behind it and used buttons from my stash.  


Below is a Composition Box that I did for Halloween 2014.  I wanted to show how different the Composition Box looks with different ideas.  


Thank you for looking ;)

Items Used
Gina's Designs

Graphic 45
Botanical Tea


Saturday, October 10, 2015

Halloween Door Owl by Dianna's Crafts

Hi Everyone, Dianna here with a Halloween Door Owl.  I used Gina's Designs Door Owl and  Graphic 45's Steampunk Spells. 


I spray painted the owl with black paint.  While I waited for the paint to dry, I punched the feathers, about 250 feathers.  It seems like a lot of work but it only took about 1 hour total.  On the solid color feathers I used a Gelly Roll Pen to create "feather" lines.  After the paint dried, I used black and orange Stickles on the head of the Owl, which I dubed Clarence.  


The Clarence's wings were traced and cut out of Graphic 45's Time Flies paper. I then fussy cut two extra for the eyes. The bow was cut from a 1-inch strip of paper.  I glued it in a circle then pinched the middle, cut two tabs on the sides then used and extra strip to wrap around the middle. I then used a strip of scrap envelope (one that was sent to me) and glued it to the middle of Clarence.  I did this in order to give the feathers a better base to stick to.  I inked all of the feathers (including the black ones). 


I traced the top hat on Graphic 45's Steampunk Spells.  I used a black velvet ribbon, a black rosette, and black feathers.  The orange ribbon and orange feathers for a pop of color. The silver spider finishes the hat.   


I used gears for Clarence's nose, which were inked black.  I cut a gear in 1/2 and inked that as well.  I painted the eyes orange and because it was such a bright orange I inked the whole circle.  I used the two clocks as eyes and used metals clock hands.  


Items Used

Gina's Designs

Door Owl - Coming Soon


Graphic 45
Steampunk Spells


Saturday, October 3, 2015

Witches Cabinet by Dianna's Crafts

Hi Everyone Dianna here with my Halloween inspired by Gina's Designs cabinet and Graphic 45's Rare Oddities Collection. 

First I painted the cabinet black and then laid the pieces out on the Graphic 45 Rare Oddities - Brews and Potions paper to get the sections of the paper that I wanted.  I cut the paper, then glued the cabinet, without the paper on it with Beacon 3 in 1.  

I ended up cutting and piecing sections in the order that I wanted, so that it does not look like the original paper anymore.  I then glued the paper on the assembled cabinet.  I used black ink on the edges of the paper.  


I then fussy cut matching bottles and scroll work, inking the edges.  I then used chipboard strips to pop them up.  


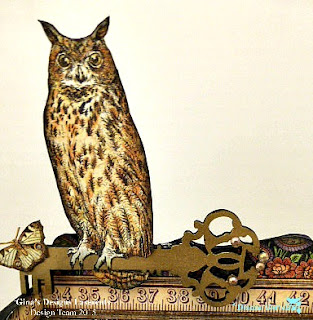
I then fussy cut the owl and butterfly out from the Graphic 45 Rare Oddities - Ghostly Greeting.  I inked the edges and used a gold paint pen on Gina's Wooden Decorative Key.  I used black ink to distress the key and used a bronze Sharpie on clear stones then placed the stones on the key.  I used chipboard scrap to give the owl some support.  Then I glued the owl and butterfly to the key and the key to the cabinet. 


I painted one of Gina's spiderwebs black and used purple Stickles to give 
a little bling.  I then labeled bottles and put some glitter and micro beads as frogs eyes.  I then labeled the books that I had gotten on clearance. 


I can place everything in drawer for storage when the Holiday is over. 


Lastly, I painted Gina's new three witches (the pretty one) white, then used markers to draw her hair, skin and top. I used the back of the Rare Oddities to create the skirt.  


I did not want to glue her to the cabinet so I designed a stand using chipboard strips and strips from an envelopes that were mailed to me using priority mail.  Yes, I save everything.  


Thank you for looking!


Items Used

Gina's Designs
Witches (Coming Soon)


Graphic 45
Rare Oddities Collection
Ghostly Greetings
Brews and Potions